Summary: in this tutorial, you have learned about the PL/SQL nested tables in Oracle and how to manipulate their elements effectively.
Introduction to PL/SQL nested tables #
Nested tables are single-dimensional, unbounded collections of homogeneous (same data type) elements.
- First, a nested table is single-dimensional, meaning that each row has a single column of data like a one-dimension array.
- Second, a nested table is unbounded. It means that the number of elements of a nested table is predetermined.
- Third, homogeneous elements mean that all elements of a nested table have the same data type.
Noted that a nested table is initially dense. However, it can become sparse through the removal of elements.
Declaring a nested table variable #
Declaring a nested table is a two-step process:
First, declare the nested table type using this syntax:
TYPE nested_table_type
IS TABLE OF element_datatype [NOT NULL];Code language: SQL (Structured Query Language) (sql)Then, declare the nested table variable based on a nested table type:
nested_table_variable nested_table_type;Code language: SQL (Structured Query Language) (sql)It is possible to create a nested table type located in the database:
CREATE [OR REPLACE] TYPE nested_table_type
    IS TABLE OF element_datatype [NOT NULL];Code language: SQL (Structured Query Language) (sql)
If you want to drop a type, use the following DROP TYPE statement:
DROP TYPE type_name [FORCE]; Code language: SQL (Structured Query Language) (sql)Initializing a nested table #
When you declare a nested table variable, it is initialized to NULL.
To initialize a nested table, you can use a constructor function. The constructor function has the same name as the type:
nested_table_variable := nested_table_type();Code language: SQL (Structured Query Language) (sql)You can also declare a nested table and initialize it in one step using the following syntax:
nested_table_variable nested_table_type := nested_table_type();Code language: SQL (Structured Query Language) (sql)Adding elements to a nested table #
To add an element to a nested table, you first use the EXTEND method:
nested_table_variable.EXTEND;Code language: SQL (Structured Query Language) (sql)Then, use the assignment operator (:=) to add an element to the nested table:
nested_table_variable := element;Code language: SQL (Structured Query Language) (sql)If you want to add multiple elements, you use the EXTEND(n) method, where n is the number of elements that you want to add:
nested_table_variable.EXTEND(n);

nested_table_variable(nested_table_variable.LAST - (n-1)) := element_1; -- Adjust index for multiple extends
nested_table_variable(nested_table_variable.LAST - (n-2)) := element_2;

-- ...Code language: SQL (Structured Query Language) (sql)
Accessing elements by their indexes #
To access an element at a specified index, you use the following syntax:
nested_table_variable(index);Code language: SQL (Structured Query Language) (sql)Iterate over the elements of a nested table #
Nested tables have the FIRST and LAST methods that return the first and last indexes of elements respectively.
Therefore, you can use these methods to iterate over the elements of a nested table using a FOR loop:
FOR l_index IN nested_table_variable.FIRST..nested_table_variable.LAST
LOOP
    -- access element

END LOOP;Code language: SQL (Structured Query Language) (sql)
Putting it all together #
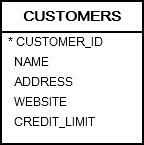
We’ll use the customers table from the sample database for the demonstration:
The following example illustrates how to use a cursor to get the first 10 customer names, add the customer names to a nested table, and iterate over the elements:
DECLARE
    -- declare a cursor that return customer name
    CURSOR c_customer IS
        SELECT name
        FROM customers
        ORDER BY name
        FETCH FIRST 10 ROWS ONLY;
    -- declare a nested table type
    TYPE t_customer_name_type
        IS TABLE OF customers.name%TYPE;

    -- declare and initialize a nested table variable
    t_customer_names t_customer_name_type := t_customer_name_type();

BEGIN
    -- populate customer names from a cursor
    FOR r_customer IN c_customer
    LOOP
        t_customer_names.EXTEND;
        t_customer_names(t_customer_names.LAST) := r_customer.name;
    END LOOP;

    -- display customer names
    FOR l_index IN t_customer_names.FIRST..t_customer_names.LAST
    LOOP
        dbms_output.put_line(t_customer_names(l_index));
    END LOOP;
END;Code language: SQL (Structured Query Language) (sql)
Let’s examine the example in detail.
First, declare a cursor that returns the first 10 alphabetically sorted customer names.
CURSOR c_customer IS
        SELECT name
        FROM customers
        ORDER BY name
        FETCH FIRST 10 ROWS ONLY;Code language: SQL (Structured Query Language) (sql)
Next, declare a nested table type:
TYPE t_customer_name_type
   IS TABLE OF customers.name%TYPE;Code language: SQL (Structured Query Language) (sql)
Then, declare a nested table variable and initialize it using the nested table constructor:
t_customer_names t_customer_name_type := t_customer_name_type(); Code language: SQL (Structured Query Language) (sql)After that, fetch customer names from the cursor and add them to the nested table:
FOR r_customer IN c_customer LOOP
    t_customer_names.EXTEND;
    t_customer_names(t_customer_names.LAST) := r_customer.name;
END LOOP;Code language: SQL (Structured Query Language) (sql)
Finally, iterate over the elements of the nested table and display each:
FOR l_index IN t_customer_names.FIRST..t_customer_names.LAST
LOOP
    dbms_output.put_line(t_customer_names(l_index));
END LOOP;Code language: SQL (Structured Query Language) (sql)
Here is the output:
3M
ADP
AECOM
AES
AIG
AT&T
AbbVie
Abbott Laboratories
Advance Auto Parts
AetnaCode language: SQL (Structured Query Language) (sql)
In this tutorial, you have learned about the PL/SQL nested tables in Oracle and how to manipulate their elements effectively.